Temporary Labelling:
The photographic collection will be submitted in a template that includes a proper labelling protocol, but until you start putting your information into the template, make sure you have all the required data stored with your specimens.
For each specimen you need to record:
- the date collected. You will submit that as year, month, day and formatted as 2016 VIII 31 (for example).
- the collector (author) of the insect – which will be you, for all or most of your specimens.
- the location of the insect when collected or photographed, i.e. Saskatoon, SK, Vegreville, AB, Flin Flon, MB.
- the environment the insect was found in, i.e. canola crop, indoors, under log in rain forest, in bed with me!, etc.
You can store a handwritten label with this information in your vials of alcohol together with your specimen. If you do this make sure you use pencil to write the information. Alcohol dissolves ink.
You may collect with a friend or group of friends. This is a great deal of fun. Decide who the collector of that insect is and then put your initials afterwards so I know that the insect is shared. However, you must each take your own photographs. Sharing of the photos is not permitted.
Example: Bob Smith is the collector/author of the insect. But I am sharing the insect specimen and have taken my own photographs of it. My initials are NAM.
 2016 V 29

Saskatoon, SK

Bob Smith (NAM)
Also, do not have most of your insects shared. Reserve it for ‘rarer’ specimens. I want everyone out in the field collecting and looking or it defeats the purpose of the exercise.
Keying Out Insects:
In addition to providing the photographs, don’t forget you are required to key your insect specimens out to Order and Family (and some cases you will be even be able to identify a specimen to Genus and species). You can do this using your preserved specimens directly (best option) or from the very clear detailed pictures you took of insects in the field.
You can start IDing your insects whenever you want to. However, do not worry unduly about this during the summer collecting months – instead focus on collecting your specimens - but keep in mind that keying will take time and that you have most of the semester to key out your insects.
Keys:
- Field Crop and Forage Pests in their Natural Enemies in Western Canada. Identification and Management Field Guide. Agriculture and Agri-foods Canada. Available for free on-line. Some hard copies might be available. This is a required text for this course. It has a key to order at the beginning. While this key is quite limited, it will get you off to a good start. By using it you will get the hang of using an insect key and start to learn to look at different parts of insect anatomy.
- Borror, DeLong and Triplehorn. The most recent edition is the 7th (2000 [2004 reprint]). Any edition of the Borror and DeLong's Introduction to the Study of Insects contains a really good key to family. These books are intended to be used in a laboratory setting. They have line drawings and can be quite technical. They are not an easy picture guide or key. The older editions, of course, will have more issues due to taxonomic changes but for our purposes it won’t be a huge problem. If you can find one of these books during the summer, snap it up.
- Many other keys are available, but may be hard to find. Keep your eyes open. I will continue to look for and list appropriate keys as I find them as well.
Specimen Slide Template:
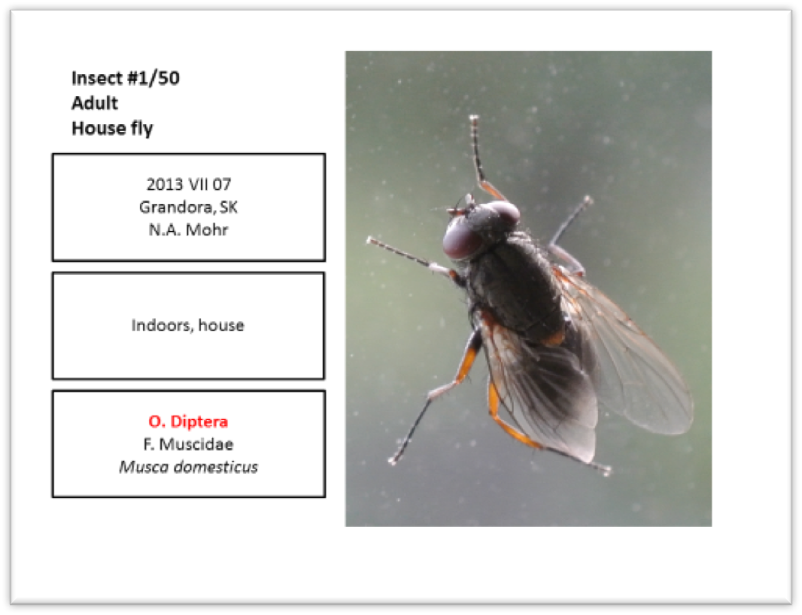 Just to help you get an idea of what the photographic submission will consist of I have included this example. The template for the slides hasn’t been finalized, but will be similar to this.
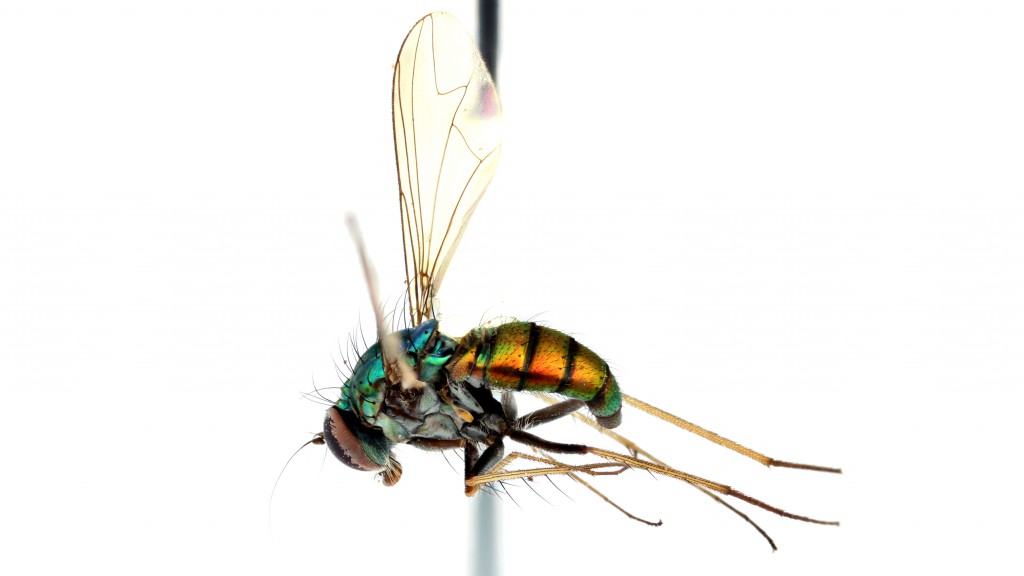
More than one photograph maybe needed for a positive ID. For example, I might have included a photo of the mouthparts.